I made this a few weeks back, but was afraid to post it too soon since I was planning on giving it as a gift to da hubs for Valentine's Day and didn't want to spoil the surprise for him. Cause he reads this blog. Sometimes. When I tell him to. 😉
And so I am giving it to those of you who are scrambling for a last minute gift idea to put together before your sweetie comes home from work. Or for those who are so on it, they are already prepping for next year. If that's you, good on you.
Can we first say that I LOVE VALENTINE'S DAY!?? Cue all the heart emojis Blogger has to offer...aaaaand GO: ❤❣♥♡💓💖💗💘💙💚💛💜💝💟😍💕💞
I really do.
It makes me feel happy inside.
Even in college when I didn't have a S.O. I loved Valentine's Day.
WHO WOULDN'T WANT TO CELEBRATE LOVE??
And to those of you who hate it because "you should be telling the people you love that you love them every day, you don't need a special day, blah blah blah, my name is Eeyore..." I hope you also hate Christmas and Easter, cause same principle applies!
Ah HA! I gotcha there, now didn't I??
ANYWHOOOO... Onto the booklet.
You can download it one of two ways which are as follows:
❥ Download only the pages you want. Hand them out as individual Valentines/Coupons, keep
them all for yourself, etc
❥ Download the PDF and print them in duplex mode, making sure not to let Reader resize them,
cut them out, and bind them however you like to (I just sloooooowly sewed mine together with
my machine).
Now that that is out of the way, I must warn you; if you don't like terrible love puns about blubbery sea-creatures, then this ain't the book for you...
Halloween is upon us, y'all! Last year I waited a long time to post my Halloween costumes because by the time I had pictures of the boys in them it was after Halloween and I figured people wouldn't be looking up costume ideas in the middle of December...maybe I was wrong?
Anyway, this year I figure why the heck not post? If this post gets buried under a year of other posts across the world wide web it'll just join every one of my other posts.
I just said posts four times in one sentence. Let's ignore that cause I'm not rewriting it...
This year I had grand plans for Halloween. Ever since I was a senior in high school I've always wanted to dress up like Lucius and Narcissa Malfoy and have my kids be house-elves. So this year I figured I could go for it.
It turns out that 3 1/2 year olds have opinions on what they get to be for Halloween. Bummer.
My oldest told me he wanted to be a fish for Halloween. A fish. Laaaame. Trying to be creative I decided he could be Flounder, my youngest could be Sebastian, my husband could be Prince Eric, and I could be Ariel. That'd be fun! I started brainstorming the boys' costumes (luckily not buying materials yet) when my oldest started getting really into Mulan. Like, really really into it.
We'd borrowed the soundtrack from the library on a whim, "Hmm, this might be fun, throw it in the bag..." and that kid glommed onto it so hard. He was watching the movie at least 4 times a week. Every car trip was 4 songs on repeat, and most conversations we had were in some way related to Mulan. I'll tell you what, I wasn't complaining. I love Mulan! I love the music, I love the humor, and now, as I parent, I cry several times throughout it, each time I watch it; I can't help it.
So when I asked my bud if he was sure he wanted to be a fish for the eleventy-millionth time and he said, "No, I changed my mind. I want to be the funny guy. I want to be Mushu the dragon!" I wasn't surprised.
I was hesitant at first. How in the world was I going to make a dragon and cricket costume??? But after some digging, and some ideas of my own I got to work, trying to make it as simple as possible.
A Very Mulan Halloween
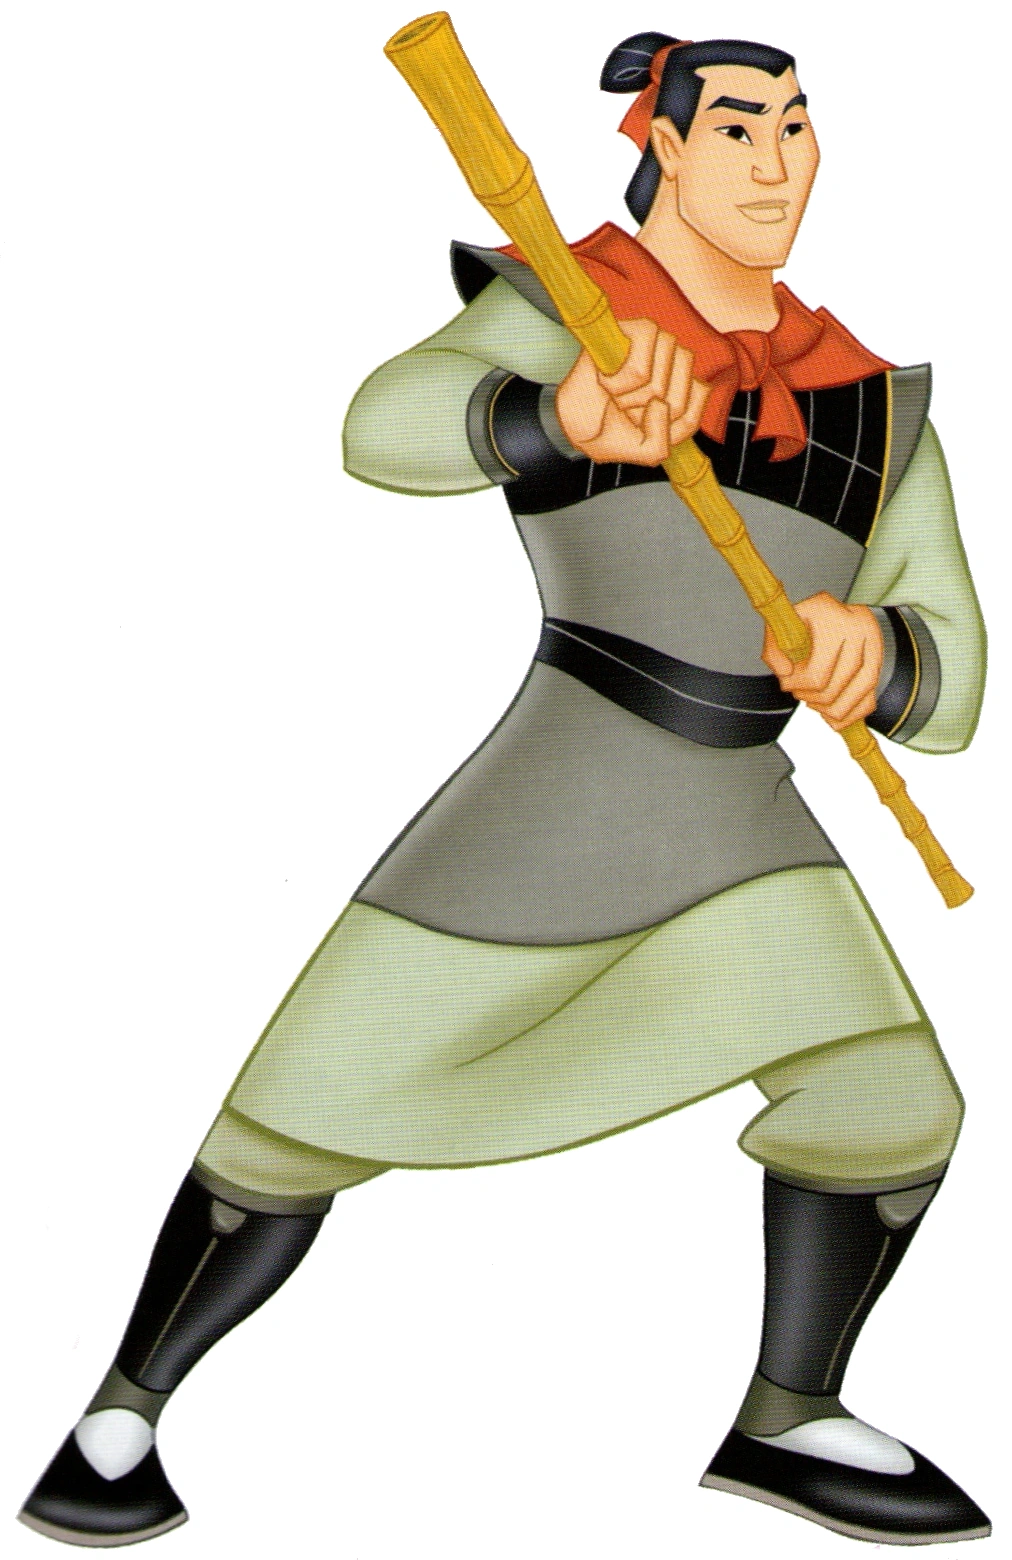
Starring D as Kri Kee, L as Mushu, Shawn as Li Shang, and Morgan as Mulan
Kri Kee
For D's costume I stumbled upon this photo on the Googles:
It's adorable and seemed really simple to DIY. I dug around in things I had on hand and was able to make this costume quickly.
What I had on Hand:
An old blue onsie
I unpicked the sleeves and hot-glued black ribbon in lines across the little belly.
A set of warm navy blue underclothes
I did have to buy sweats - I had the thermal top.
Purple felt
I hot-glued the wings to the shirt and will probably go back and stitch it on.
Black & white felt
I hot-glued them to the beanie.
I purchased:
A purple beanie from Value Village
Black pipe cleaners
I just fed the pipe cleaner straight through the beanie, fed it back up ~ 1/2 inch over, and wrapped the end of it around the top to avoid sharp ends sticking into heads.
Krik Kee - ✓
Mushu
For L's costume I found two points of reference. I took bits and pieces from the following:
This picture:
This YouTube video (just concepts, not technique...)
After doing the full-body suits last year (and knowing that Shawn's costume would be a lot of work) I knew I wanted to start with a red long-sleeved top and some sweats as a base so I wouldn't need to create everything from scratch. This was a good choice. Unfortunately I had very little on hand for this costume.
They were each only $3.88, the color is very vibrant, and the sweats feel so soft and warm. Score! I could only find the top in a 5T which I decided would be perfect; since it's not warm enough to wear alone, he can wear a warmer layer underneath.
Black ribbon
1/4 yard of Yellow cotton fabric for the tummy
I sewed the black ribbon in stripes across a strip of this (getting farther apart at the widest places and closer together at the thinner areas). I hand-sewed the striped strip down the middle of the shirt and made another strip (that narrows at the crotch) and machine sewed it to the pants.
1/2 yard of red cotton fabric for tail
Cut out a long strip of red that was larger on one end, sewed up the sides, turned inside out, used a piece of at the bottom of the tail to make it curve up, and stuffed that thing so full it is bulging.
Sewed along the top - pinned to back of pants.
I used a piece of the red felt (below) and cut it in a 'fire' ish type shape and sewed it onto the end of the tail.
Red and yellow thread.
Red beanie
Red, Black, Blue (2 shades) felt for ears, horns, and back plates
Similar to the video I used foil to shape the horns and covered them with felt with hot-glue.
Unlike the video, I cut the back of the shirt open and sewed the back plates into the shirt so that they would stand up better. It was way easier and looked a lot nicer.
Unlike the video, I hot-glued the horns and sewed the ears to the beanie since I didn't have a hood, and I assumed it would have more support than a hood.
Unlike the video, I glued a piece of black felt on top of the ears instead of coloring them with Sharpie - it looked a lot better.
Yellow pipe cleaners for whiskers
I just threaded them through the bottom of the knit beanie similar to the way I did Krik Kee's antennae.
Mushu - ✓
Li Shang
For Shawn's costume I found a super awesome YouTube video, a picture, and a blog post that I used as a point of reference.
Black material - I found 1 yard of 'speaker' material in the remnants bin for cheap.
I used this for:
Shoulder cover thingy-ma-bob
Watch the video, I did it almost exactly like she did
Wrist guards
Made similarly to, but much more poorly than, the video
Shin guards
Just wrapped fabric around the legs like in the video.
Belt/Sash
Cut a long strip that would go around Shawn's waist 1.5 times, folded it in half, sewed up the sides (I was okay if it wasn't totally lined up because I wanted it to look a little 'bunchy'...is that the right word?), turned it right side out. I wrapped starting in the back and then safety pinned the two ends to the shirt and other part of sash.
Gold ribbon for wrist guards and shoulder cover thingy-ma-bob.
Grey wide tank dress from Value Village
1 yard red cotton fabric for the cape
I did not sew anything, I just tied it around his shoulders.
Black Beanie
Black Yarn
The wig tutorial I'm sure is awesome, but I was not good at it and our wigs are completely ridiculous. But they made us laugh, so we'll keep it.
I followed the Cinderella bun tutorial for Li Shang's wig.
I used some of the Mulan ribbon I purchased (below) to tie around the bun.
Li Shang - ✓
Mulan
For my costume, Thrifted Transformations came through again with a companion YouTube video for Mulan. I took ideas on what types of items I could use or thrift and then used the picture below (because it was the most basic outfit Mulan wears in the movie) as a point of reference. I also used the same Blog Post on wigs to attempt mine. It was a terrible flop, but I tried...
The picture:
What I Had on Hand:
Green (tealish) deep V long-sleeved blouse
Tan tank top
Shawn's old navy blue t-shirt
I measured my above my bust, waist, and hips; armpit to waist; and waist to hips.
I folded the shirt in half.
Starting just under the collar I measured a 1/4 of bust measurement from fold toward sleeves (not getting all the way to the sleeve) and marked the line (this will be the top of the garment).
I measured from there down my 'armpit to waist' measurement and marked a line from fold towards sleeve (this will be the center of the garment) the length of 1/4 my waist measurement.
I measured from the that mark down my 'waist to hips' measurement and marked the 1/4 hips measurement line (this will be the width of the bottom of the garment).
I cut that out, sewed up the sides, hemmed the top and bottom and called it a day.
What I Purchased:
Yellow maxi dress from Value Village
I wore the dress around my waist to get me the length I needed.
Wide maroon ribbon
Wrapped a length of the ribbon around my waist several times and safety-pinned it in place.
Black Beanie
For wig (baaaaaaaaaaaahahahahahahaha...)
Black Yarn
Mulan - ✓ And that's a wrap! My boys LOVED their costumes this year! L has told me about 10 times that he wants to wear his Mushu costume LOTS of times, and D wears his hat all day everyday. If you want to check out what we did for Halloween last year you can see them here.